This article explains how to configure MaskProxy into the BitBrowser browser environment. Fingerprint browsers usually require separate proxy settings for each environment.
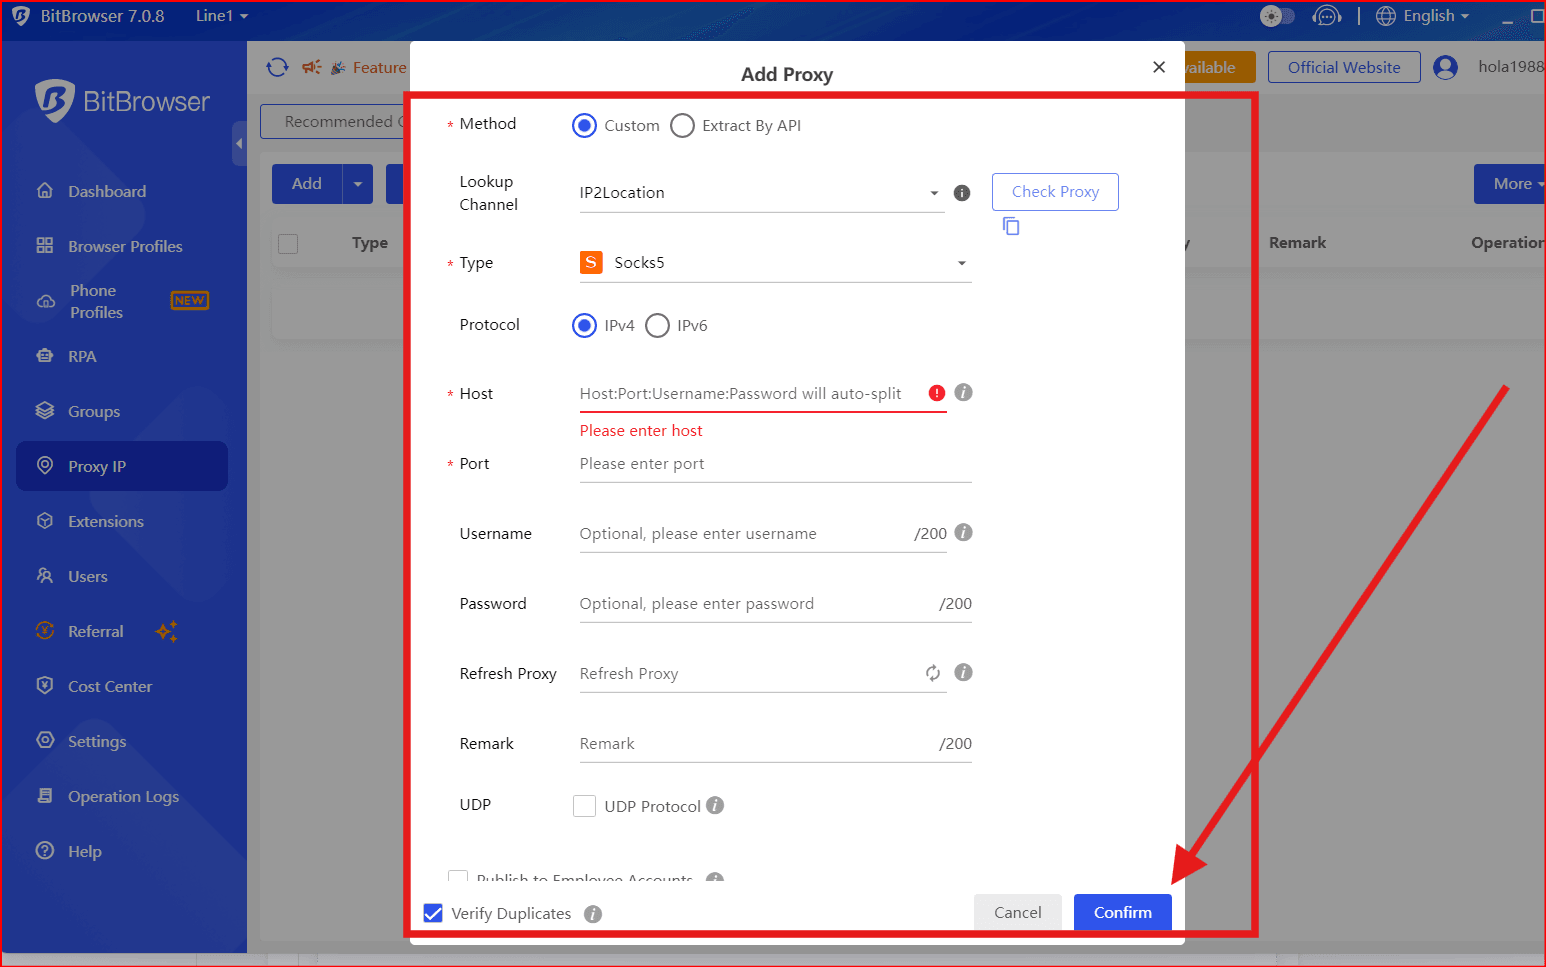
Step 1: Prepare proxy parameters in the MaskProxy dashboard
- Log in to the MaskProxy dashboard.
- Enter "My Proxy" and open the product you want to use: rotating residential proxy, rotating datacenter proxy, static residential proxy or static datacenter proxy.
- Copy proxy host, port, username and password.
- Select HTTP or SOCKS5 protocol based on tool support.
- Dynamic proxy first confirms the remaining GB traffic; static proxy first confirms that the IP status is normal and has not expired.
Bit Browser usually requires these four parameters: host, port, username, and password. If the tool only accepts one line of proxy, the following general format can be used.
username:password@host:portStep 2: Fill in the proxy in Bit Browser environment
- Open Bit Browser, create a new browser environment, or edit an existing environment.
- Find the "proxy" "network" or "Proxy" settings area.
- Select HTTP or SOCKS5 protocol for proxy type.
- The host fills in the proxy host displayed in the MaskProxy dashboard, and the port fills in the port number.
- Fill in the user name and password respectively with the proxy credentials copied in the background.
- Click to detect proxy or check connection, and save the environment after passing.
Recommendations for use in multiple environments
- In account login environments, it is recommended to use static proxy first to maintain export stability.
- Batch access, short sessions, or tasks that require export rotation can use dynamic proxy.
- It is recommended to use different proxy parameters or different static IPs in different environments to facilitate troubleshooting risks and regional differences.
- Perform proxy detection before saving the environment to avoid subsequent batch startup failures.
Step 3: Test connection
- Click "Test proxy" "Check proxy" in Bit Browser or save and open the IP query page.
- Confirm that the exit IP is different from the real IP of the machine.
- Confirm that the export region is generally consistent with the background selection.
- If it is a dynamic proxy, observe whether the IP switching meets the current time limit when making multiple requests; if it is a static proxy, confirm that the exit IP remains stable.
Common troubleshooting
- Connection failure: Check whether the host and port are complete, and only fill in numbers for the port.
- Authentication failed: Copy the username and password again, avoiding extra spaces or line breaks.
- Protocol Error: Confirm that the HTTP or SOCKS5 protocol was selected in the tool and not another protocol type.
- Region inconsistency: Use multiple IP query sites for cross-validation.
- The dynamic proxy cannot be used: check the remaining GB traffic; the static proxy cannot be used: check the IP status and expiration time.
Please only use proxy in compliance business scenarios, and comply with the usage rules of the target website, platform and third-party tools. Do not send the complete proxy string, password or API link to public channels.